Introduction
Ever since Kali NetHunter was released, I’ve been following the project closely. However, the list of compatible devices was always quite limited. When the OnePlus 3 (OP3) launched just as I was looking to upgrade my phone, NetHunter hadn’t yet added support for it—though it already supported the OnePlus One and OnePlus 2. I figured it was only a matter of time.
Sure enough, around December the OP3 appeared on the NetHunter GitHub wiki’s supported device list. I flashed it in January, and here are my notes.
Flashing
Official GitHub: https://github.com/offensive-security/kali-nethunter
I first tried building from source following the official wiki, but that failed. I switched to the official nightly builds instead, and it worked. I was running OxygenOS 3.2.8; on top of that I flashed the NetHunter kernel via TWRP and then the generic rolling zip file.
Official builds: https://build.nethunter.com/nightly
After a reboot, install the Kali chroot, and you’re good to go.
Modules
Below is a quick overview of the features and tools bundled with NetHunter. English documentation is available on the official wiki.
Kali NetHunter Application
- Home Screen - General information panel, network interfaces and HID device status.
- Kali Chroot Manager - For managing chroot metapackage installations.
- Check App Update - For checking Kali NetHunter Android App updates.
- Kali Services - Start / stop various chrooted services. Enable or disable them at boot time.
- Custom Commands - Add your own custom commands and functions to the launcher.
- MAC Changer - Change your Wi-Fi MAC address (only on certain devices)
- VNC Manager - Set up an instant VNC session with your Kali chroot.
- HID Attacks - Various HID attacks, Teensy style.
- DuckHunter HID - Rubber Ducky style HID attacks — essentially a phone-based Rubber Ducky emulator.
- BadUSB MITM Attack - Uses the USB device as an external NIC for man-in-the-middle attacks.
- MANA Wireless Toolkit - Set up a rogue access point at the click of a button.
- MITM Framework - Inject binary backdoors into downloaded executables on the fly.
- NMap Scan - Quick Nmap scanner interface.
- Metasploit Payload Generator - Generating Metasploit payloads on the fly.
- Searchsploit - Easy searching for exploits in Exploit-DB.
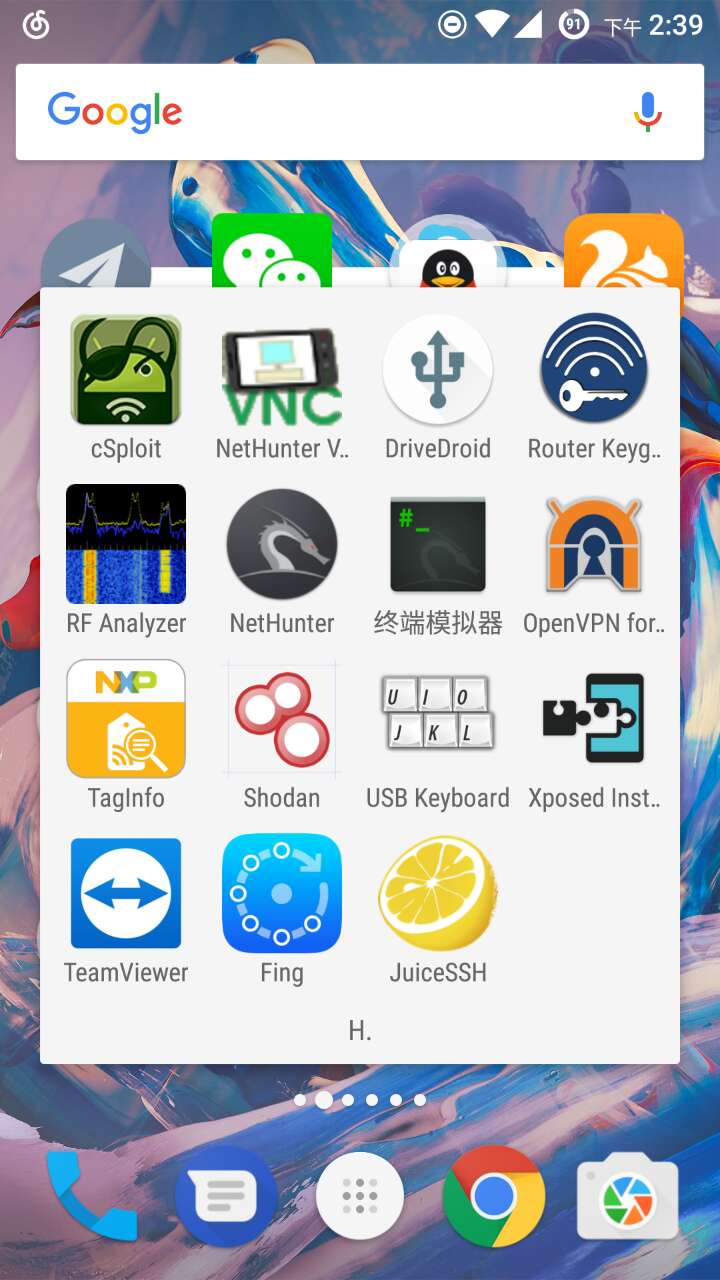
3rd Party Android Applications (WIP)
- NetHunter Terminal Application
- DriveDroid — Mount ISO images to USB, effectively turning your phone into a bootable drive.
- USB Keyboard — Use your phone’s touchscreen as a keyboard and mouse.
- Shodan — The search engine for Internet-connected devices; need I say more.
- Router Keygen
- cSploit — An incredibly powerful LAN penetration testing tool.
Hardware Support
Since the OP3’s built-in wireless card doesn’t support monitor mode, an external adapter is required. I went with the legendary TP-Link WN722N. You’ll also need a USB OTG cable with a Type-C connector.
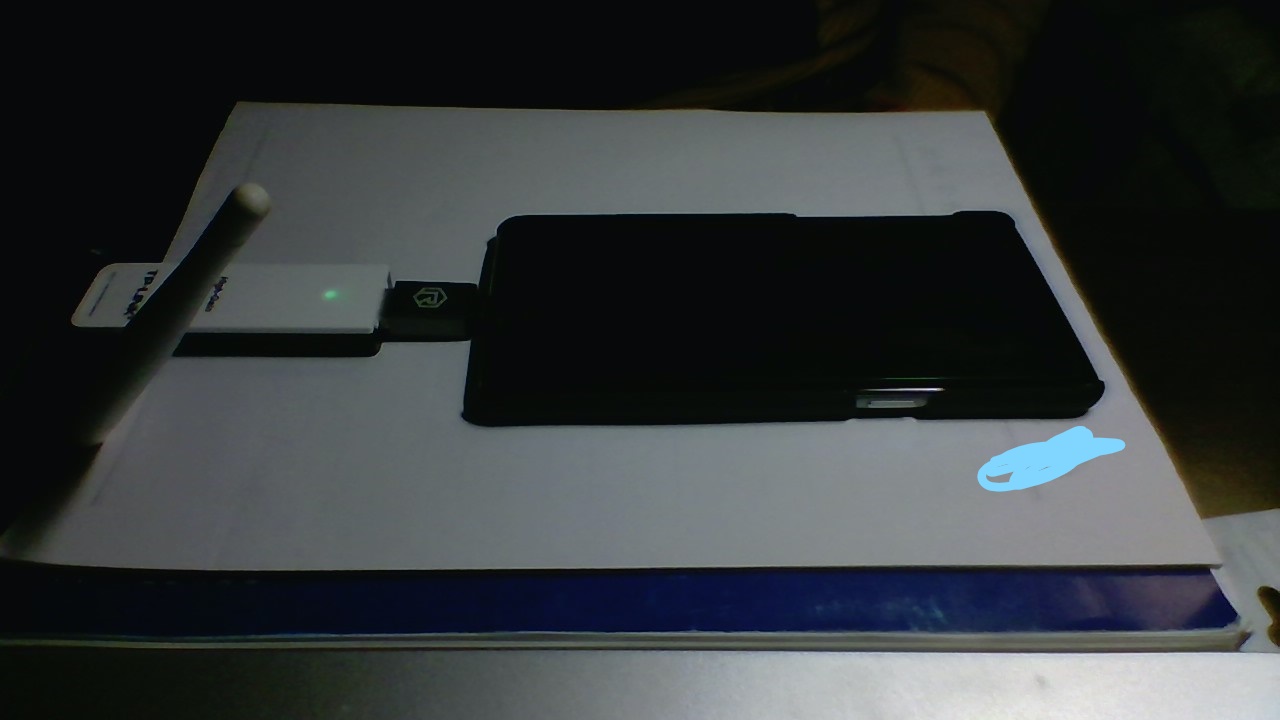
Note that the WN722N shows up as wlan1; before using it, make sure to run:
ifconfig wlan1 up
Additionally, NetHunter supports connecting to a WiFi Pineapple and also has RF Analyzer for RF devices (I haven’t tested either of these personally, and I suspect their utility is limited for most use cases).
Finally, here’s a screenshot of my NetHunter home screen
I’ve already successfully demonstrated an 802.1x Wi-Fi phishing attack on the OP3—stay tuned for the write-up!